首付款
首付款是买方在销售合同达成时支付的部分款项。这意味着双方(卖方和买方)都完全承诺遵守合同。
通过支付定金,买方支付总金额的一部分,并同意在以后的日期支付剩余金额。作为回报,卖方在接受定金后向买方提供商品或服务,相信剩余金额将在以后支付。
Create invoices
当销售订单确认后,可以通过销售订单表单左上角的 创建发票 按钮来创建发票。点击后,会弹出一个 创建发票 弹窗。
注解
Invoices are automatically created as drafts, so they can be reviewed before validation.
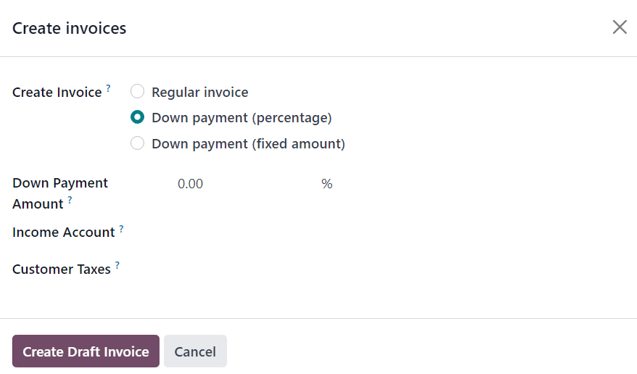
在 创建发票 弹出窗口中,有 3 个选项可供选择,在 创建发票 字段中:
普通发票
首付款(百分比)
首付款(固定金额)
注解
If Regular Invoice is selected, the other fields disappear, as they only pertain to down payment configurations.
首付款申请
On the Create invoices pop-up form, the down payment options are:
首付款(百分比)
首付款(固定金额)
Once the desired down payment option is selected in the Create Invoice field on the pop-up form, designate the desired amount, either as a percentage or a fixed amount, in the Down Payment Amount field.
Then, select the appropriate income account for the invoice in the Income Account field. Next, select a tax amount, if necessary, in the Customer Taxes drop-down field.
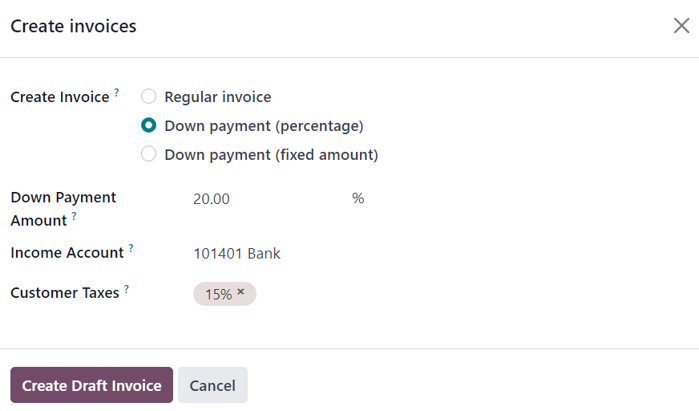
Once all fields are filled in with the desired information, click the Create Draft Invoice button. Upon clicking this button, Odoo reveals the Customer Invoice Draft.
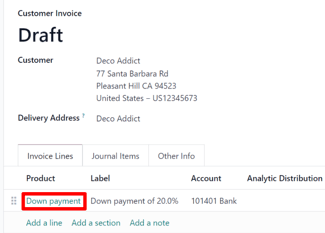
In the Invoice Lines tab of the Customer Invoice Draft, the down payment that was just configured in the Create invoices pop-up form appears as a Product.
注解
When the Down payment product in the Invoice Lines tab is clicked, Odoo reveals the product form for the down payment.
By default, the Product Type of down payment products generated for invoices are set as Service, with the Invoicing Policy set to Prepaid/Fixed Price.
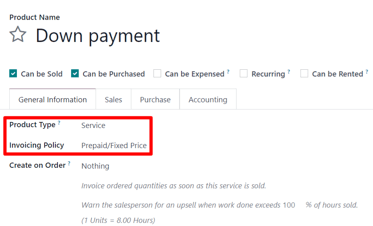
This product can be edited/modified at any time.
警告
If Based on Delivered Quantity (Manual) is chosen as the Invoicing Policy, an invoice will not be able to be created.
Example: request 50% down payment
注解
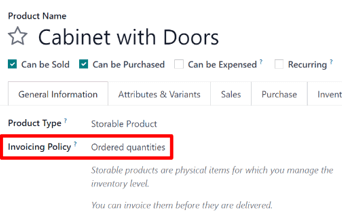
The following example involves a 50% amount down payment on a product (Cabinet with Doors) with Ordered quantities as the Invoicing Policy.
另请参阅
First, navigate to , and add a Customer to the quotation.
Then, click Add a product in the Order Lines tab, and select the Cabinet with Doors product.
When the order is confirmed (via the Confirm button), the quotation turns into a sales order. Once this occurs, create and view the invoice by clicking Create Invoice.
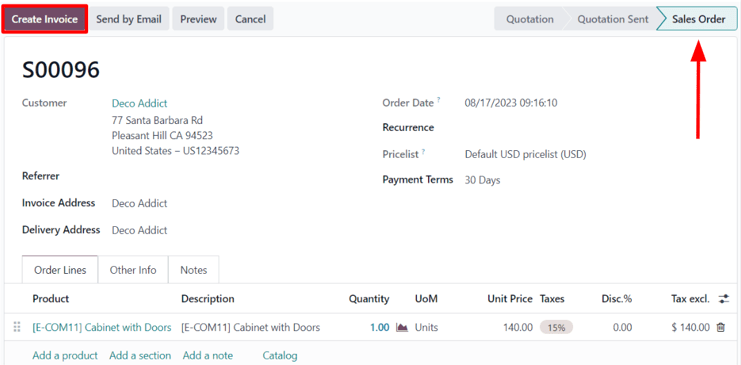
Next, on the Create invoices pop-up window that appears, select Down payment
(percentage), and type 50 in the Down Payment Amount field.
注解
The Income Account and Customer Taxes fields are not required fields, and they will not appear if they’ve already been preconfigured in previous down payment requests.
For more information, check out the documentation on customer taxes modification on down payments and income account modification on down payments.
Lastly, click Create Draft Invoice to create and view the invoice draft.
Clicking Create Draft Invoice reveals the draft invoice, which includes the down payment as a Product in the Invoice Lines tab.
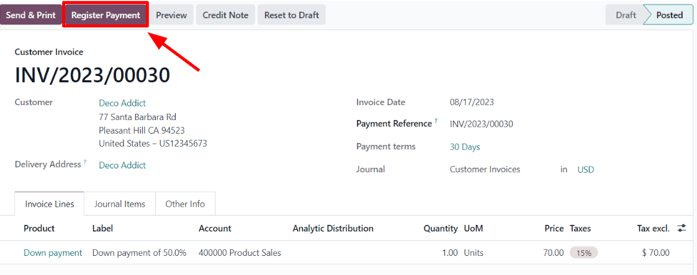
From there, the invoice can be confirmed and posted by clicking Confirm. Confirming the invoice changes the status from Draft to Posted. It also reveals a new series of buttons at the top of the page.

From those buttons, the payment can be registered by clicking Register Payment.
Doing so reveals a Register Payment pop-up form, which is auto-populated with the necessary information. Confirm the information provided is correct and make any necessary adjustments. When ready, click the Create Payment button.
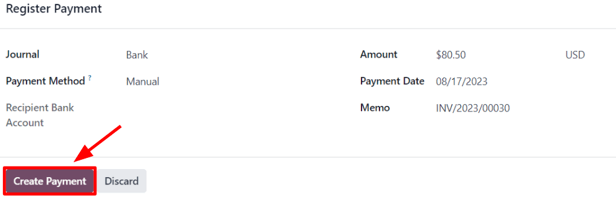
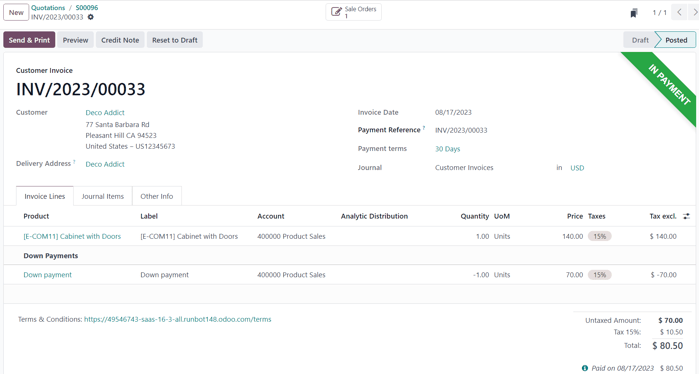
After clicking Create Payment, Odoo reveals the customer invoice, now with a green In Payment banner in the upper-right corner.
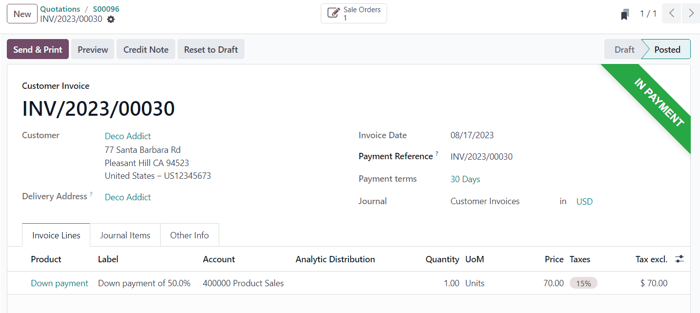
Now, when the customer wants to pay the remaining amount of the order, another invoice must be created. To do that, return to the sales order, via the breadcrumb links.
Back on the sales order, a new Down Payments section is present in the Order Lines tab, along with the down payment that was just invoiced and posted.
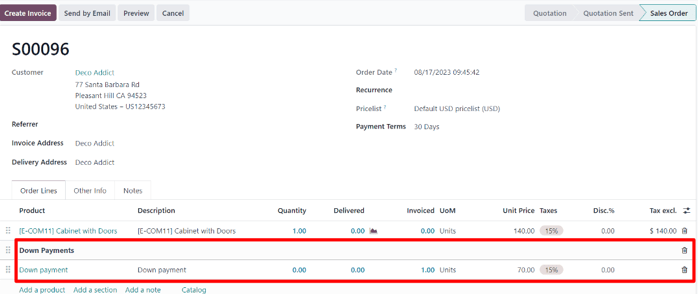
Next, click the Create Invoice button.
On the Create invoices pop-up window that appears, there are two new fields: Already invoiced and Amount to invoice.
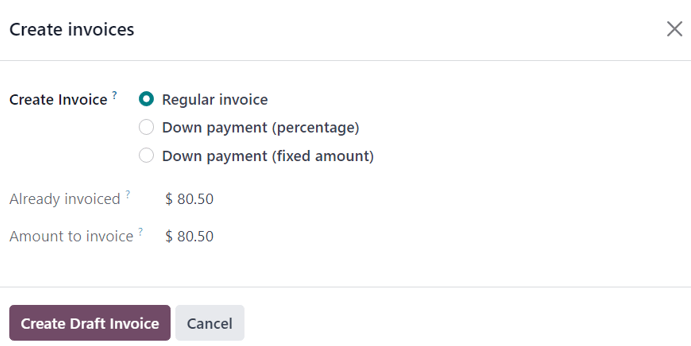
If the remaining amount is ready to be paid, select the Regular Invoice option. Odoo will create an invoice for the exact amount needed to complete the total payment, as indicated in the Amount to invoice field.
Once ready, click Create Draft Invoice.
Doing so reveals another Customer Invoice Draft page, listing all the invoices for that specific sales order in the Invoice Lines tab. Each invoice line item displays all the necessary information related to each invoice.
To complete the flow, click Confirm, which changes the status of the invoice from Draft to Posted. Then, click Register Payment.
Once again, the Register Payment appears, with all fields auto-populated with the necessary information, including the remaining amount left to be paid on the order.
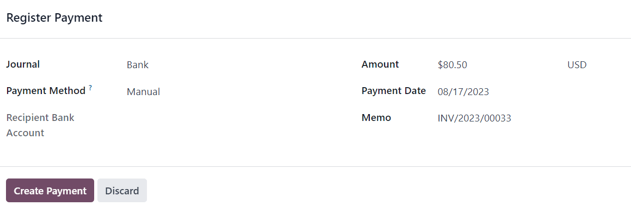
After confirming that information, click Create Payment. Doing so reveals the final Customer Invoice with a green In Payment banner in the upper-right corner. Also, both down payments are present in the Invoice Lines tab.
At this point, the flow is now complete.
注解
这个流程也可以使用 固定金额 预付款选项。
重要
If a down payment is used with a product that has a Delivered quantities invoicing policy, the down payments will not be able to be deducted when it comes time to invoice the customer.
This is because, due to the invoicing policy, the product(s) would have to be delivered before creating the final invoice.
If nothing has been delivered, a Credit Note is created, which cancels the draft invoice that was created after the down payment.
To utilize the Credit Note option, the Inventory application must be installed, in order to confirm the delivery. Otherwise, the delivered quantity can be entered manually directly on the sales order.
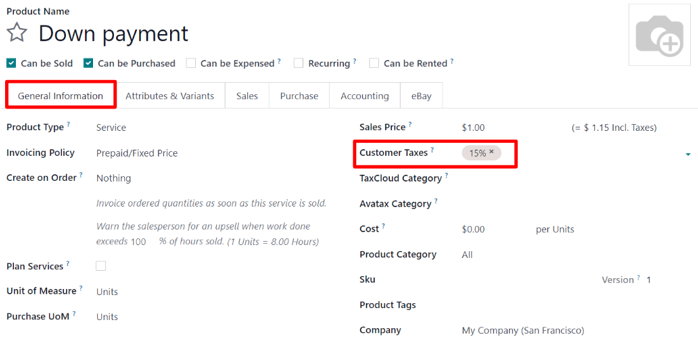
Customer taxes modification on down payments
要调整与预付款相关的收入账户和客户税项,请导航到 产品 页面 (),在搜索栏中搜索 预付款 产品,并选择它以显示产品详细信息页面。
On the Down Payment product page, in the General Information tab, the customer taxes can be modified in the Customer Taxes field.
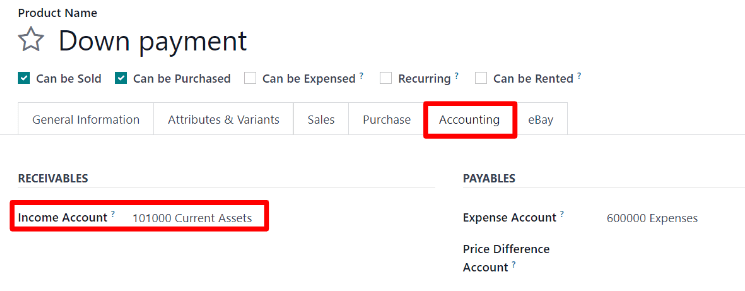
Income account modification on down payments
To change or adjust the income account attached to the Down Payment product page, the Accounting app must be installed.
With the Accounting app installed, the Accounting tab becomes available on the product page. That tab will not be accessible without the Accounting app installed.
In the Accounting tab, the income account can be changed in the Income Account field, located in the Receivables section.
另请参阅